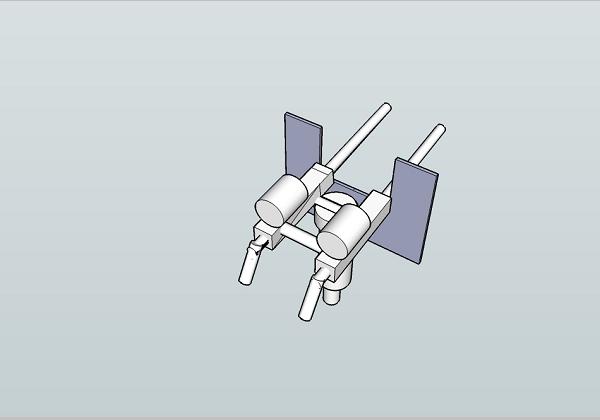
When I was ten I didn't have the money or the patience for assembling delicate brass-etched sighting gear for a scale replica of a 20mm Oerlikon, but I was unimpressed with a bit of rolled paper on a wire. Here is a design which at least let me point the gun in various directions.....
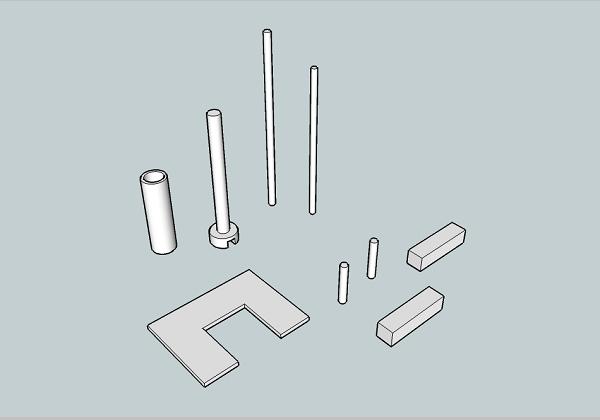
Parts List:
2 off - 1 1/2" lengths of 1/16" wire. Bend at one end if you have some pliers!
2 off - 3/8" lengths of 1/16" wire
2 off - bits of plastic from Airfix sprue - about 1/8" x 1/8" x 1/2"
1 off - brass bolt about 1 1/4" long and 1/4" diameter head - slotted
1 off - length of tube from a biro case, about 1" long
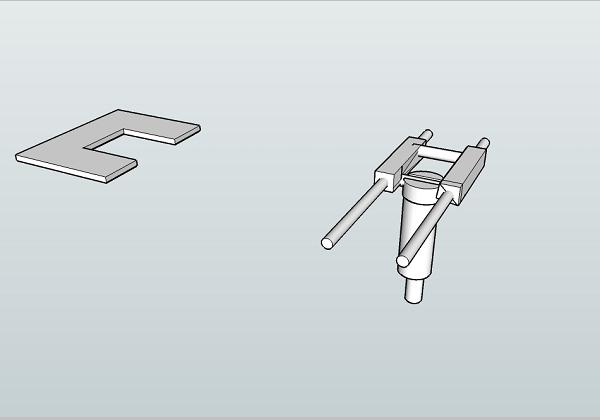
1 off - balsa or tinplate sheet for shield, about 1" x 3/4". Cut as shown.
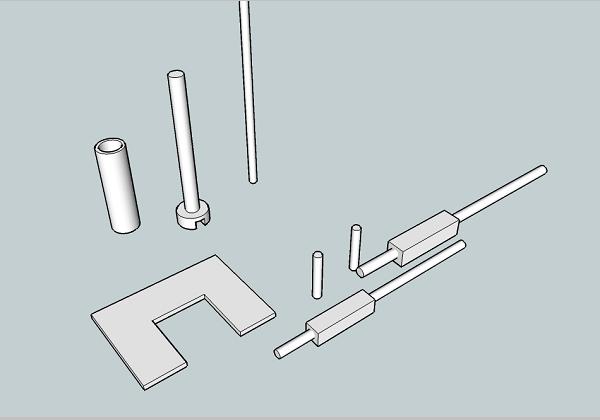
Heat the long wire in a candle flame and melt it into the plastic. File off the overflow!
Join the two gun bodies you've just made with the short wires. A hot soldering iron will let you push them into the plastic...
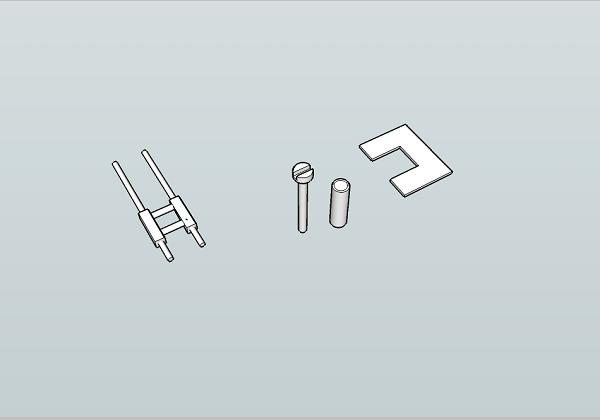
The 1/16" wire ought to be a snug fit in the slot of the bolt. You can glue it in, or, for more realism, glue or solder a small disk or washer on top of the bolt, leaving the wire free to rotate and let the gun elevate....
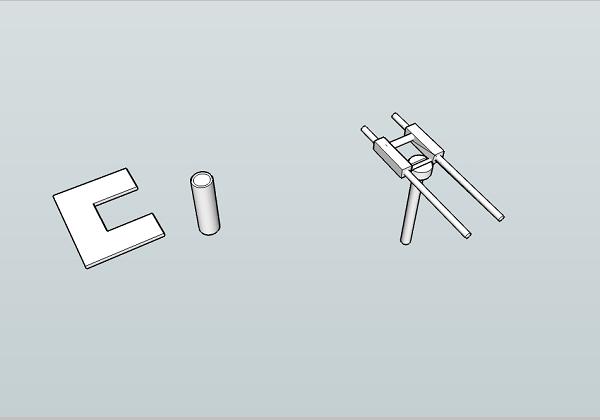
The shaft of the bolt goes in the biro tube to make a supporting pillar...