It's time for a bit of colouring! Here is the boiler being stained as Oak...
Once the hull is sealed, we can test it.
Oh, dear!
I had hoped that a four AAA battery holder would be light enough, but as you can see, it isn't. The boat looks as if it's about to take off. Eventually, I got it to float reasonably level with a lightweight LiPo, but they aren't cheap. So, back to the drawing board for a few modifications.
The batteries have to go forward. If we cut a hole in the deck, and use two twin AAA holders on their ends, we can bring the GC forward and downward...
This is how it will fit together. Ensure that the shaft with its connector has a good clearance through the slots in the balsa.
Like this.
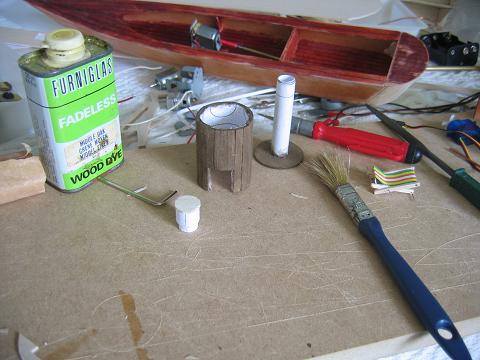
The engine and base are painted, then glued together at the bottom with epoxy to ensure a strong joint.
and here is the hull. I thought it might look nice in yellow, and so it might if I had any Canary. But Mustard...ugh!
Where is that white car spray...?
And finally some trim is added. Copper wire does the steam pipes nicely, and brass bands round the boiler can be made from Christmas tinsel.
A brass railing can be added around the engine to put a bit more colour in..
Of course, we now need a bigger dummy steam engine. Here is my offering - twin cylinders...!
And, while we're here, we might as well do the coaming and finish off the hull...
Here is the dummy boiler waiting for a copper trim round the chimney...
I'm sure the steam pipes are completely incorrect. If you're a steam buff - drop me a line and tell me what I should have done...
And this is what it looks like in position. With the coaming held in position with cyano, it's starting to look like it was meant to...